状态:未完成
本文介绍了Support V7中Card View、Drawer layout、GridLayout、Palette、RecyclerView、AsyncListUtil、GridLayoutManager、ItemTouchHelper、LinearLayoutManager、SortedList和RecyclerView配合使用、Staggered Grid Layout Manager等组件的使用。
Card View
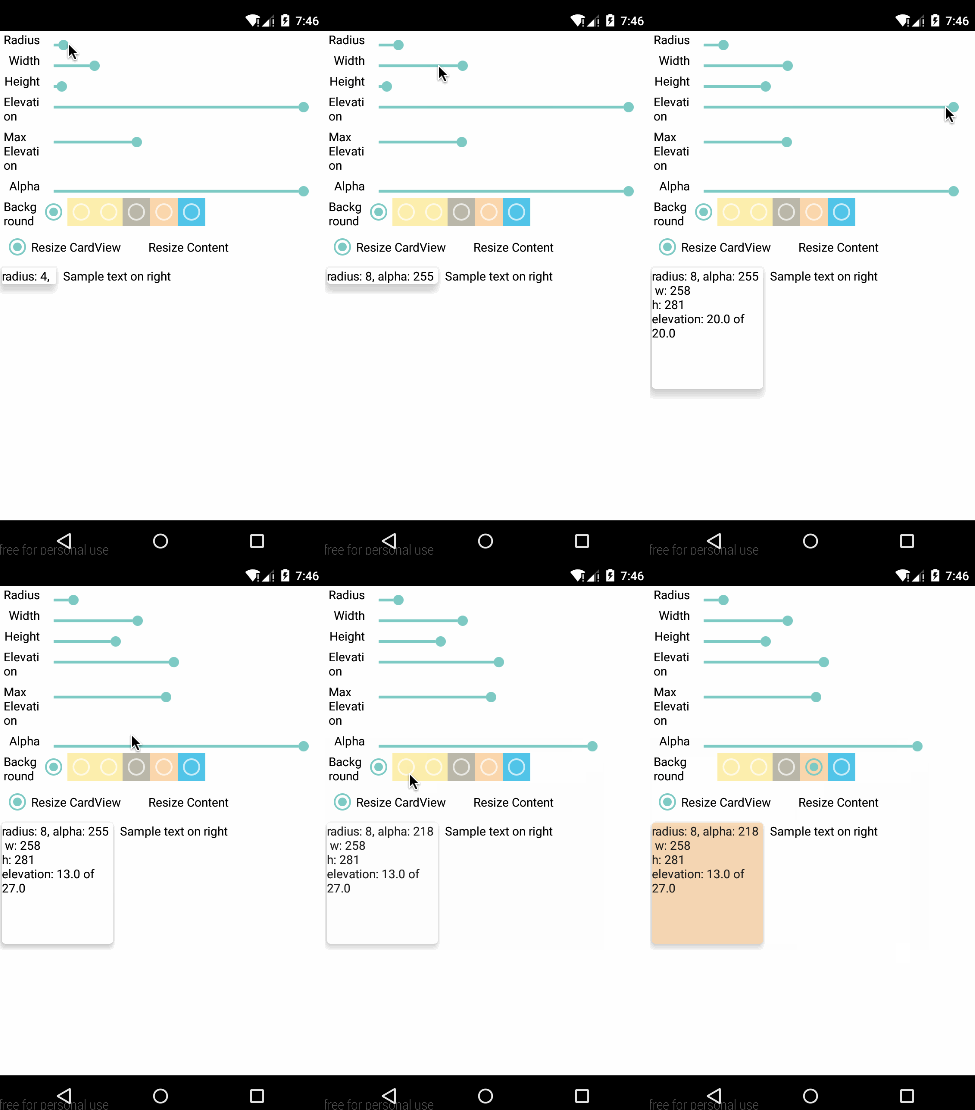
演示了CardView的用法。
xml文件1
2
3
4
5
6
7
8
9
10
11
12
13
14
15
16
17
18
19
20
21
22
23<RelativeLayout android:layout_width="fill_parent"
android:layout_height="match_parent">
<android.support.v7.widget.CardView
android:id="@+id/card_view"
android:layout_width="wrap_content"
android:layout_height="wrap_content"
card_view:cardElevation="10dp"
android:clickable="true"
android:layout_margin="8dp">
<TextView
android:id="@+id/info_text"
android:text="@string/card_view"
android:textColor="@android:color/black"
android:layout_width="wrap_content"
android:layout_height="wrap_content" />
</android.support.v7.widget.CardView>
<TextView android:layout_width="wrap_content"
android:layout_height="wrap_content"
android:text="@string/card_view_sample_text"
android:textColor="@android:color/black"
android:layout_toRightOf="@id/card_view"
android:layout_alignTop="@id/card_view"/>
</RelativeLayout>
相关代码:1
2
3
4
5
6
7
8
9
10
11
12
13
14
15
16
17
18
19
20
21
22
23
24
25
26
27
28
29
30
31
32
33
34
35
36
37private void update() {
mElevationSeekBar.setMax(mMaxElevationSeekBar.getProgress());
if (mCornerRadiusSeekBar.getProgress() != mCardView.getRadius()) {
mCardView.setRadius(mCornerRadiusSeekBar.getProgress());
}
if (mElevationSeekBar.getProgress() != mCardView.getCardElevation()) {
mCardView.setCardElevation(mElevationSeekBar.getProgress());
}
if (mMaxElevationSeekBar.getProgress() != mCardView.getMaxCardElevation()) {
mCardView.setMaxCardElevation(mMaxElevationSeekBar.getProgress());
}
ViewCompat.setAlpha(mCardView, mAlphaSeekBar.getProgress() / 255f);
ViewGroup.LayoutParams lp;
if (mResizeCardView) {
lp = setViewBounds(mCardView);
} else {
lp = setViewBounds(mInfoText);
}
mInfoText.setText("radius: " + mCornerRadiusSeekBar.getProgress()
+ ", alpha: " + mAlphaSeekBar.getProgress()
+ "\n w: " + lp.width + "\nh: " + lp.height
+ "\nelevation: " + mCardView.getCardElevation() + " of "
+ mCardView.getMaxCardElevation());
}
private ViewGroup.LayoutParams setViewBounds(View view) {
ViewGroup.LayoutParams lp = view.getLayoutParams();
boolean changed = lp.width != mWidthSeekBar.getProgress()
|| lp.height != mHeightSeekBar.getProgress();
if (!changed) {
return lp;
}
lp.width = mWidthSeekBar.getProgress();
lp.height = mHeightSeekBar.getProgress();
view.setLayoutParams(lp);
return lp;
}
Drawer layout
这个例子说明了一个Android support library中基于Material design准则的drawer组件的DrawerLayout控件结合Toolbar的常见用法。
DrawerLayout应该放在view层级的顶层,把它放在action bar的下面content views的上面。主内容大小都应该match_parent。每个drawer应该定义合理的宽度和match_parent的高度。在你的布局中Drawer views应该放在content view的后面为了保持合适顺序。
当一个navigation (left) drawer呈现时,主activity应该检测action bar的向上功能的按下作为一个打开和关闭navigation drawer的信号。drawer中的Items应该放到其中一个类别。
View switches(开关)。一个View switch依据同样基本的策略作为一个list或tab导航,view switch不会创建导航历史。这个模式应该只用于一个task的根activity,对于进入到更深导航层级的Activity留下一些向上导航的形式。
Selective Up。drawer允许用户选择一个交替parent对于向上导航。这允许用户随意跳到跨应用程序的导航层级。
使用TaskStackBuilder替换当前任务
右面的drawers应该用于actions,而不是导航。这个依据Action Bar建立的模型导航应该在左边actions在右边。action应该操作执行窗口的当前内容,例如使能或禁止当前内容顶部的数据覆盖。
当drawer是打开的,它是在应用的toolbar之上。在Android 5.0及以上版本drawer扩展为全屏的高度,包括后面的系统状态条。
先来看下布局文件:1
2
3
4
5
6
7
8
9
10
11
12
13
14
15
16
17
18
19
20
21
22
23
24
25
26
27
28
29
30
31
32
33
34
35
36
37
38
39
40
41
42
43
44
45
46
47
48
49
50
51
52
53
54
55
56
57
58
59
60
61
62
63
64
65
66
67
68
69
70
71
72
73
74<!--
A DrawerLayout is indended to be used as the top-level content view
using match_parent for both width and height to consume the full space available.
See https://www.google.com/design/spec/patterns/navigation-drawer.html#navigation-drawer-specs
for the full spec of a drawer in Material design.
-->
<android.support.v4.widget.DrawerLayout
xmlns:android="http://schemas.android.com/apk/res/android"
android:id="@+id/drawer_layout"
android:layout_width="match_parent"
android:layout_height="match_parent"
android:fitsSystemWindows="true">
<!-- As the main content view, the view below consumes the entire
space available using match_parent in both dimensions. Note that
this child does not specify android:layout_gravity attribute. -->
<LinearLayout
android:id="@+id/content"
android:layout_width="match_parent"
android:layout_height="match_parent"
android:orientation="vertical">
<!-- This will be set as the support action bar of the activity at runtime.
It needs to be a dynamic runtime call for correct vertical layering of
the drawer and the toolbar. -->
<android.support.v7.widget.Toolbar
android:id="@+id/toolbar"
android:layout_width="match_parent"
android:layout_height="?attr/actionBarSize" />
<ScrollView
android:layout_width="match_parent"
android:layout_height="match_parent"
android:scrollbarStyle="outsideOverlay">
<TextView
android:id="@+id/content_text"
android:layout_width="match_parent"
android:layout_height="match_parent"
android:text="@string/drawer_layout_summary"
android:textAppearance="?android:attr/textAppearanceMedium"
android:padding="16dp"/>
</ScrollView>
</LinearLayout>
<!-- android:layout_gravity="start" tells DrawerLayout to treat
this as a sliding drawer on the starting side, which is
left for left-to-right locales. The drawer is given arbitrary
initial width and extends the full height of the container. A
solid background is used for contrast with the content view.
android:fitsSystemWindows="true" tells the system to have
DrawerLayout span the full height of the screen, including the
system status bar on Lollipop+ versions of the plaform. The actual
width of drawer will be determined at runtime based on the screen
size according to the Material spec. -->
<ListView
android:id="@+id/start_drawer"
android:layout_width="wrap_content"
android:layout_height="match_parent"
android:layout_gravity="start"
android:background="#333333"
android:fitsSystemWindows="true"/>
<!-- android:layout_gravity="end" tells DrawerLayout to treat
this as a sliding drawer on the ending side, which is
right for left-to-right locales. The drawer is given arbitrary
initial width and extends the full height of the container. A
solid background is used for contrast with the content view.
The actual width of drawer will be determined at runtime based on
the screen size according to the Material spec. -->
<FrameLayout
android:id="@+id/end_drawer"
android:layout_width="wrap_content"
android:layout_height="match_parent"
android:layout_gravity="end"
android:background="#808080"/>
</android.support.v4.widget.DrawerLayout>
可以看到示例使用DrawerLayout作为内容的父布局,宽高都为match_parent,第一个子布局LinearLayout作为内容布局,宽高也高match_parent,其中包含一个Toolbar和一个ScrollView;紧随其后的控件是一个ListView作侧滑抽屉,注意layout_gravity属性为“start”,这个属性会告诉DrawerLayout这是一个开始位置的侧滑抽屉,android:fitsSystemWindows=”true”属性告诉系统伸展为屏幕的高度,在5.0+的系统上包含状态栏。它的实际宽度根据Material规范在运行时基于屏幕大小决定。最后的FrameLayout则是从右滑出的抽屉。

GridLayout Simple Form
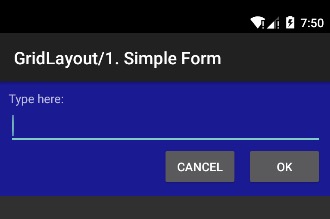
演示了使用GridLayout构建简单的表格。
1 | <android.support.v7.widget.GridLayout |
GridLayout Form(XML)
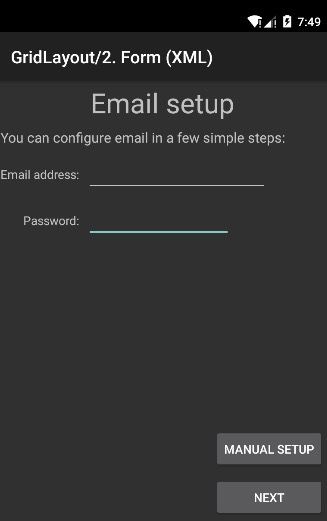
一个表格,说明了GridLayout API从XML的使用。
1 | <android.support.v7.widget.GridLayout |
GridLayout Form(Java)
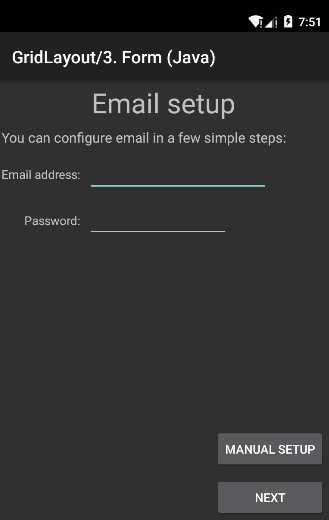
一个表格,说明GridLayout API的使用。我们演示了行/列保持顺序属性的使用,当需要的时候允许行或列越过其它的元素。
右下角的两个按钮需要和其它UI元素分离。这个可以通过分离行或分离列完成——但我们不需要都做并且可能只有足够的空间去做一个或其它的。
1 | public static View create(Context context) { |
Palette
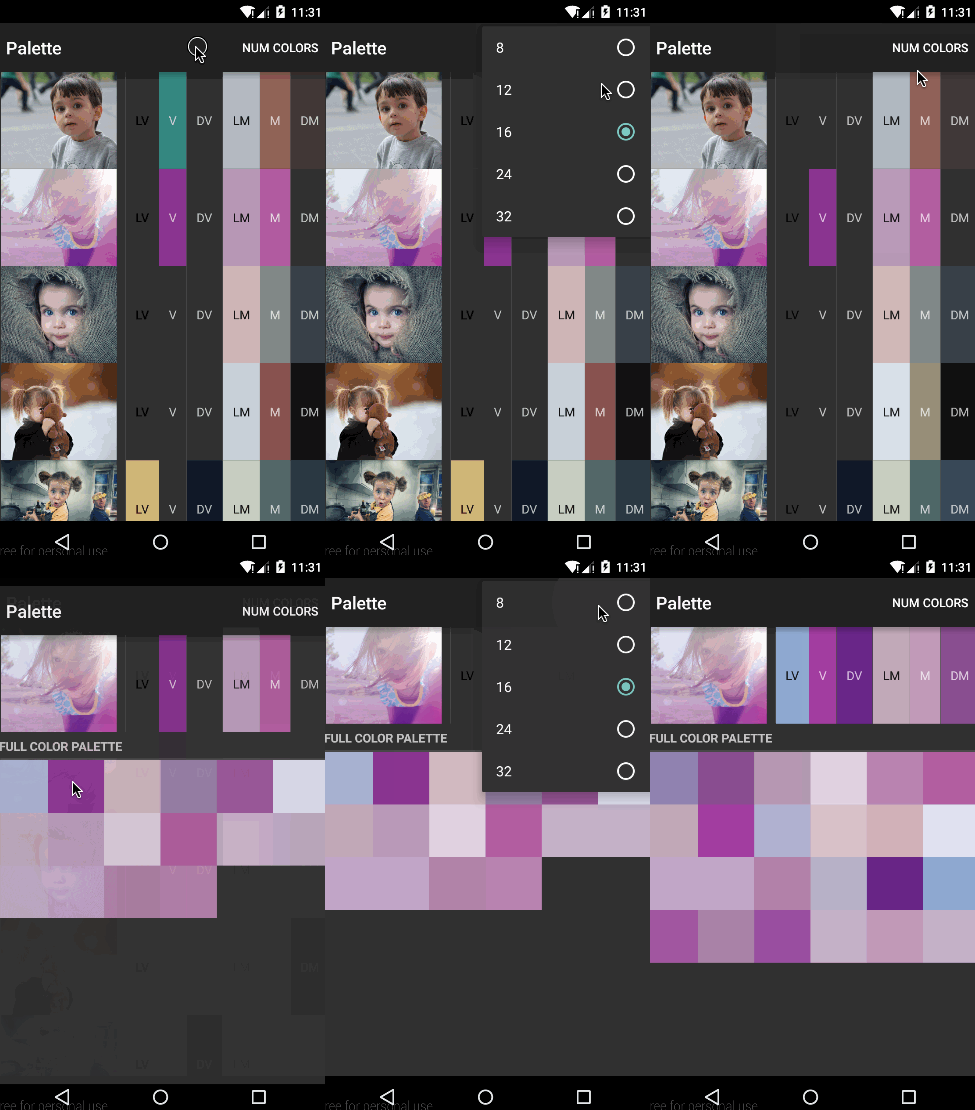
从设备MediaStore显示图片,在旁边生成android.support.v7.graphics.Palette的结果。
允许使用palette生成自定义颜色的数量,可以产生不同类型的图片。
最常用的六种颜色:1
2
3
4
5
6palette.getVibrantSwatch()
palette.getMutedSwatch()
palette.getLightVibrantSwatch()
palette.getLightMutedSwatch()
palette.getDarkVibrantSwatch()
palette.getDarkMutedSwatch()
相关代码:1
2
3
4
5
6
7
8
9
10
11
12
13
14
15
16
17
18
19
20
21
22
23Palette.from(bitmap).maximumColorCount(mNumColors).generate(new Palette.PaletteAsyncListener() {
@Override
public void onGenerated(Palette palette) {
setBackgroundColor(
view.findViewById(R.id.text_vibrant),
palette.getVibrantSwatch());
setBackgroundColor(
view.findViewById(R.id.text_muted),
palette.getMutedSwatch());
setBackgroundColor(
view.findViewById(R.id.text_light_vibrant),
palette.getLightVibrantSwatch());
setBackgroundColor(
view.findViewById(R.id.text_light_muted),
palette.getLightMutedSwatch());
setBackgroundColor(
view.findViewById(R.id.text_dark_vibrant),
palette.getDarkVibrantSwatch());
setBackgroundColor(
view.findViewById(R.id.text_dark_muted),
palette.getDarkMutedSwatch());
}
});
AnimatedRecyclerView
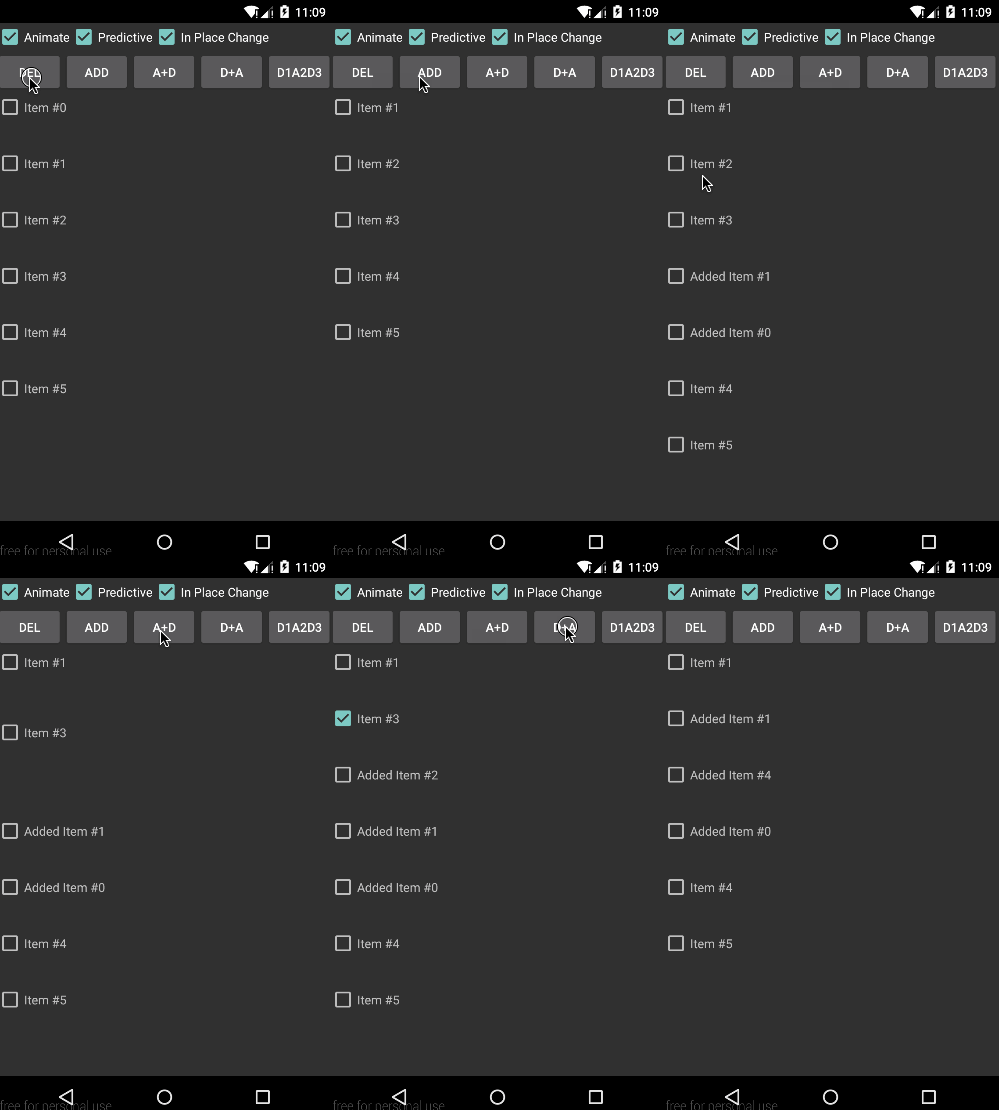
演示了带有动画的RecyclerView的常见用法。
AsyncListUtil
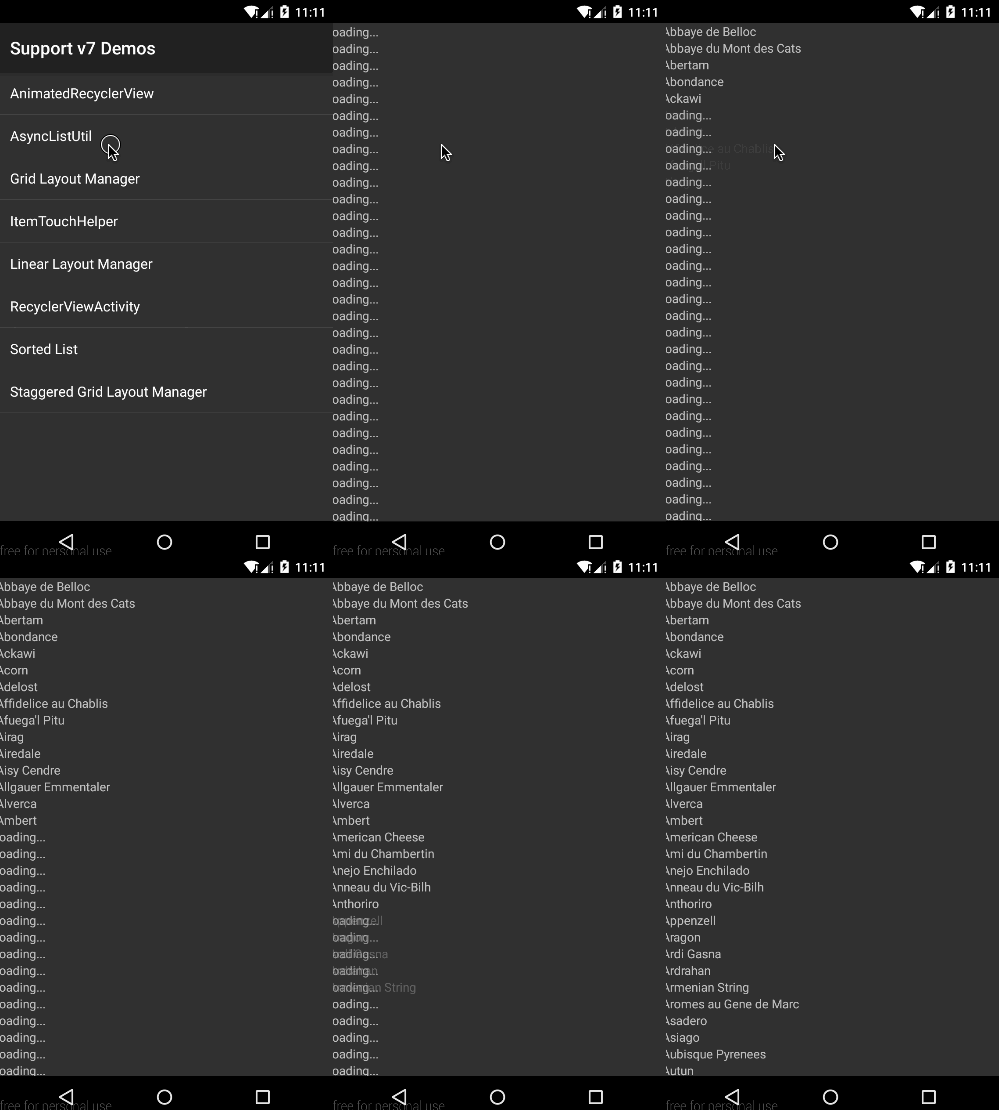
一个说明了AsyncListUtil功能的例子。使用了RecyclerView来展示数据。
1 | private static class TextViewHolder extends RecyclerView.ViewHolder { |
Grid Layout Manager
一个说明了GridLayoutManager功能的例子。
Item TouchHelper —— Drag and Drop Activity
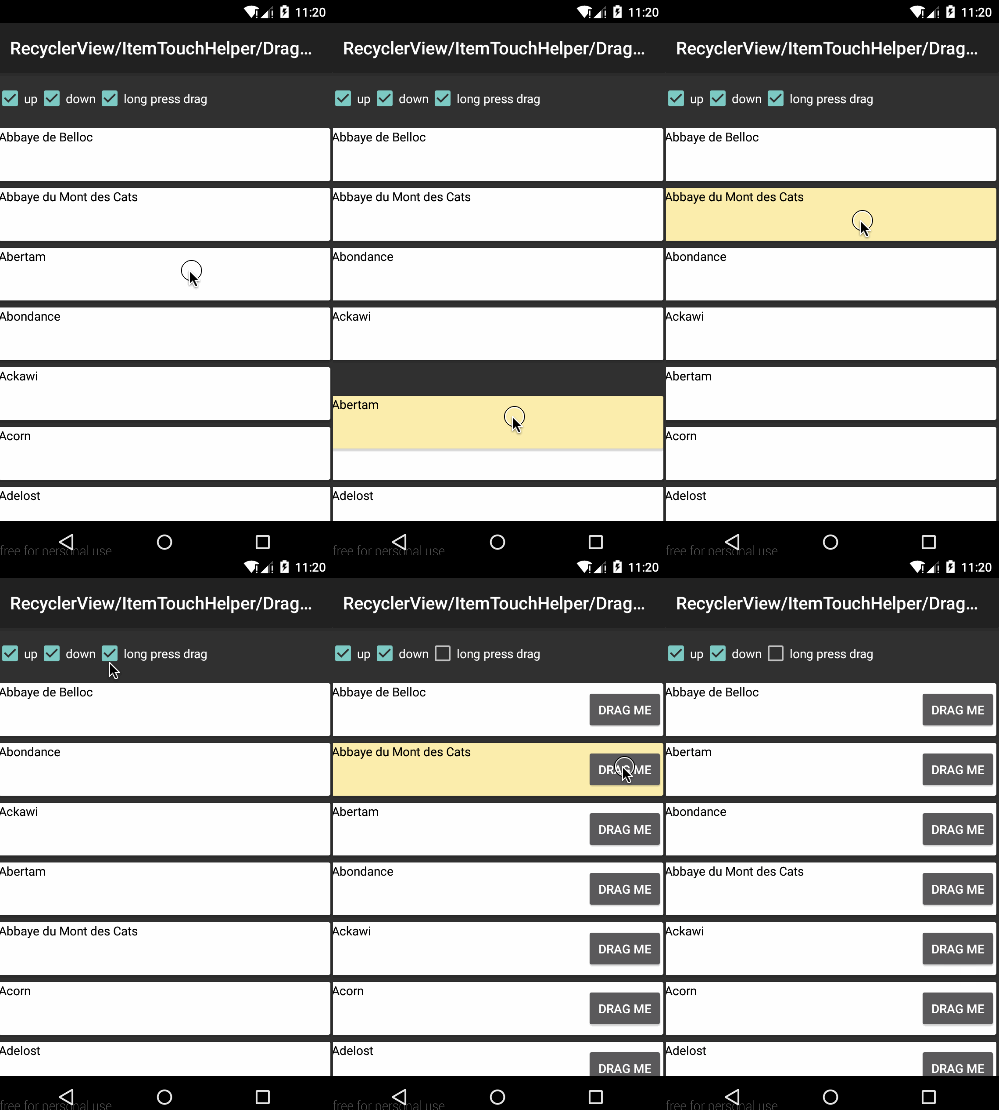
演示了ItemTouchHelper实现拖拽的例子。可以设置向上或向下拖拽,长按拖拽或指定控件拖拽。
Item TouchHelper —— Swipe To Dismiss
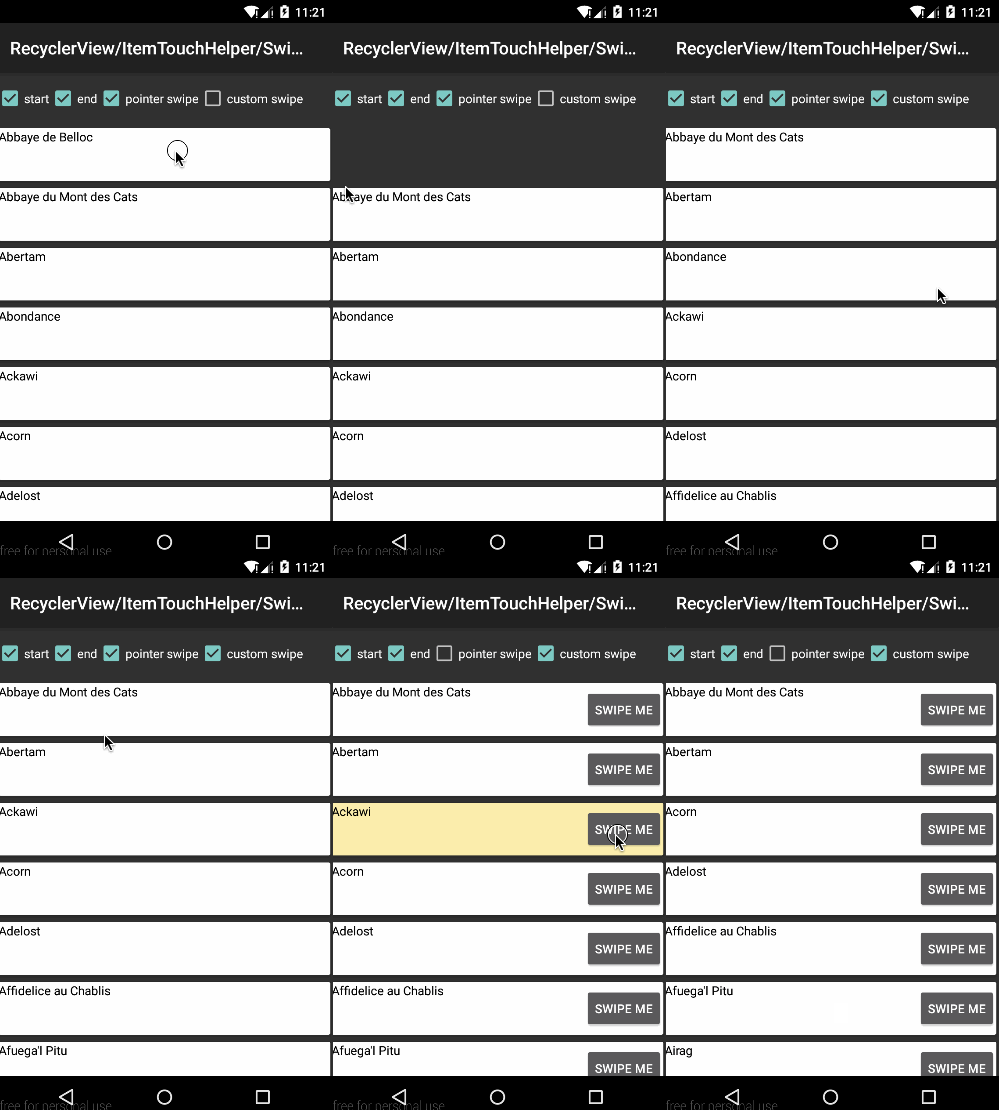
演示了ItemTouchHelper实现滑动消失的例子。可以设置左滑、右滑,指定控件滑动及自定义滑动效果。
Linear Layout Manager
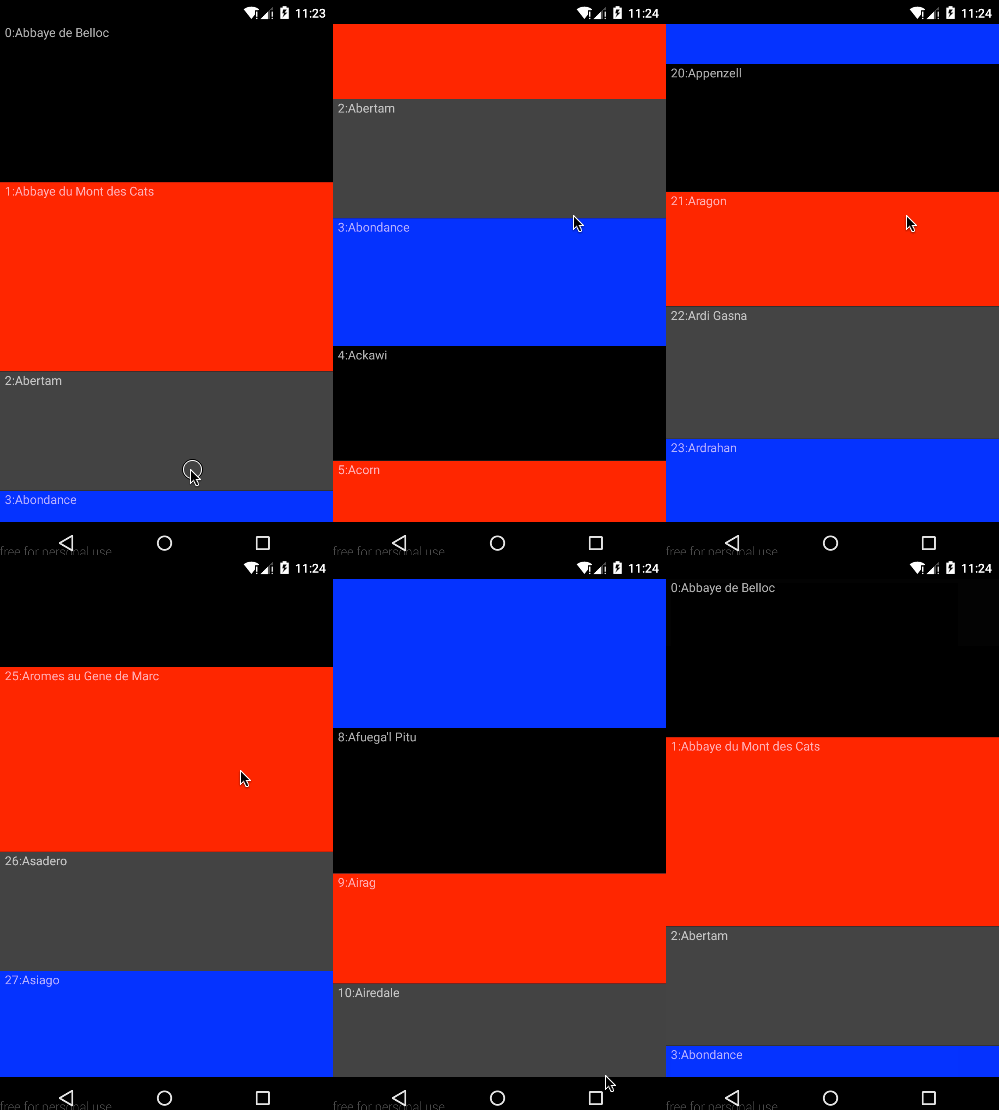
使用LinearLayoutManager的例子。
RecyclerViewActivity
RecyclerView的创建:
1 | final RecyclerView rv = new RecyclerView(this); |
基本的ListView样式的布局管理器:1
2
3
4
5
6
7
8
9
10
11
12
13
14
15
16
17
18
19
20
21
22
23
24
25
26
27
28
29
30
31
32
33
34
35
36
37
38
39
40
41
42
43
44
45
46
47
48
49
50
51
52
53
54
55
56
57
58
59
60
61
62
63
64
65
66
67
68
69
70
71
72
73
74
75
76
77
78
79
80
81
82
83
84
85
86
87
88
89
90
91
92
93
94
95
96
97
98
99
100
101
102
103
104
105
106
107
108
109
110
111
112
113
114
115
116
117
118
119
120
121
122
123
124
125
126
127
128
129
130
131
132
133
134
135
136
137
138
139
140
141
142
143
144
145
146
147
148
149
150
151
152
153
154
155
156
157
158
159
160
161
162
163
164
165
166
167
168
169
170
171
172
173
174
175
176
177
178
179
180
181
182
183
184
185class MyLayoutManager extends RecyclerView.LayoutManager {
private static final String TAG = "MyLayoutManager";
private int mFirstPosition;
private final int mScrollDistance;
public MyLayoutManager(Context c) {
final DisplayMetrics dm = c.getResources().getDisplayMetrics();
mScrollDistance = (int) (SCROLL_DISTANCE * dm.density + 0.5f);
}
@Override
public void onLayoutChildren(RecyclerView.Recycler recycler, RecyclerView.State state) {
final int parentBottom = getHeight() - getPaddingBottom();
final View oldTopView = getChildCount() > 0 ? getChildAt(0) : null;
int oldTop = getPaddingTop();
if (oldTopView != null) {
oldTop = oldTopView.getTop();
}
detachAndScrapAttachedViews(recycler);
int top = oldTop;
int bottom;
final int left = getPaddingLeft();
final int right = getWidth() - getPaddingRight();
final int count = state.getItemCount();
for (int i = 0; mFirstPosition + i < count && top < parentBottom; i++, top = bottom) {
View v = recycler.getViewForPosition(mFirstPosition + i);
addView(v, i);
measureChildWithMargins(v, 0, 0);
bottom = top + getDecoratedMeasuredHeight(v);
layoutDecorated(v, left, top, right, bottom);
}
}
@Override
public RecyclerView.LayoutParams generateDefaultLayoutParams() {
return new RecyclerView.LayoutParams(ViewGroup.LayoutParams.MATCH_PARENT,
ViewGroup.LayoutParams.WRAP_CONTENT);
}
@Override
public boolean canScrollVertically() {
return true;
}
@Override
public int scrollVerticallyBy(int dy, RecyclerView.Recycler recycler,
RecyclerView.State state) {
if (getChildCount() == 0) {
return 0;
}
int scrolled = 0;
final int left = getPaddingLeft();
final int right = getWidth() - getPaddingRight();
if (dy < 0) {
while (scrolled > dy) {
final View topView = getChildAt(0);
final int hangingTop = Math.max(-getDecoratedTop(topView), 0);
final int scrollBy = Math.min(scrolled - dy, hangingTop);
scrolled -= scrollBy;
offsetChildrenVertical(scrollBy);
if (mFirstPosition > 0 && scrolled > dy) {
mFirstPosition--;
View v = recycler.getViewForPosition(mFirstPosition);
addView(v, 0);
measureChildWithMargins(v, 0, 0);
final int bottom = getDecoratedTop(topView);
final int top = bottom - getDecoratedMeasuredHeight(v);
layoutDecorated(v, left, top, right, bottom);
} else {
break;
}
}
} else if (dy > 0) {
final int parentHeight = getHeight();
while (scrolled < dy) {
final View bottomView = getChildAt(getChildCount() - 1);
final int hangingBottom =
Math.max(getDecoratedBottom(bottomView) - parentHeight, 0);
final int scrollBy = -Math.min(dy - scrolled, hangingBottom);
scrolled -= scrollBy;
offsetChildrenVertical(scrollBy);
if (scrolled < dy && state.getItemCount() > mFirstPosition + getChildCount()) {
View v = recycler.getViewForPosition(mFirstPosition + getChildCount());
final int top = getDecoratedBottom(getChildAt(getChildCount() - 1));
addView(v);
measureChildWithMargins(v, 0, 0);
final int bottom = top + getDecoratedMeasuredHeight(v);
layoutDecorated(v, left, top, right, bottom);
} else {
break;
}
}
}
recycleViewsOutOfBounds(recycler);
return scrolled;
}
@Override
public View onFocusSearchFailed(View focused, int direction,
RecyclerView.Recycler recycler, RecyclerView.State state) {
final int oldCount = getChildCount();
if (oldCount == 0) {
return null;
}
final int left = getPaddingLeft();
final int right = getWidth() - getPaddingRight();
View toFocus = null;
int newViewsHeight = 0;
if (direction == View.FOCUS_UP || direction == View.FOCUS_BACKWARD) {
while (mFirstPosition > 0 && newViewsHeight < mScrollDistance) {
mFirstPosition--;
View v = recycler.getViewForPosition(mFirstPosition);
final int bottom = getDecoratedTop(getChildAt(0));
addView(v, 0);
measureChildWithMargins(v, 0, 0);
final int top = bottom - getDecoratedMeasuredHeight(v);
layoutDecorated(v, left, top, right, bottom);
if (v.isFocusable()) {
toFocus = v;
break;
}
}
}
if (direction == View.FOCUS_DOWN || direction == View.FOCUS_FORWARD) {
while (mFirstPosition + getChildCount() < state.getItemCount() &&
newViewsHeight < mScrollDistance) {
View v = recycler.getViewForPosition(mFirstPosition + getChildCount());
final int top = getDecoratedBottom(getChildAt(getChildCount() - 1));
addView(v);
measureChildWithMargins(v, 0, 0);
final int bottom = top + getDecoratedMeasuredHeight(v);
layoutDecorated(v, left, top, right, bottom);
if (v.isFocusable()) {
toFocus = v;
break;
}
}
}
return toFocus;
}
public void recycleViewsOutOfBounds(RecyclerView.Recycler recycler) {
final int childCount = getChildCount();
final int parentWidth = getWidth();
final int parentHeight = getHeight();
boolean foundFirst = false;
int first = 0;
int last = 0;
for (int i = 0; i < childCount; i++) {
final View v = getChildAt(i);
if (v.hasFocus() || (getDecoratedRight(v) >= 0 &&
getDecoratedLeft(v) <= parentWidth &&
getDecoratedBottom(v) >= 0 &&
getDecoratedTop(v) <= parentHeight)) {
if (!foundFirst) {
first = i;
foundFirst = true;
}
last = i;
}
}
for (int i = childCount - 1; i > last; i--) {
removeAndRecycleViewAt(i, recycler);
}
for (int i = first - 1; i >= 0; i--) {
removeAndRecycleViewAt(i, recycler);
}
if (getChildCount() == 0) {
mFirstPosition = 0;
} else {
mFirstPosition += first;
}
}
}
Sorted List
演示了SortedList和RecyclerView结合使用。
1 | private static class SortedListAdapter extends RecyclerView.Adapter<TodoViewHolder> { |
Staggered Grid Layout Manager
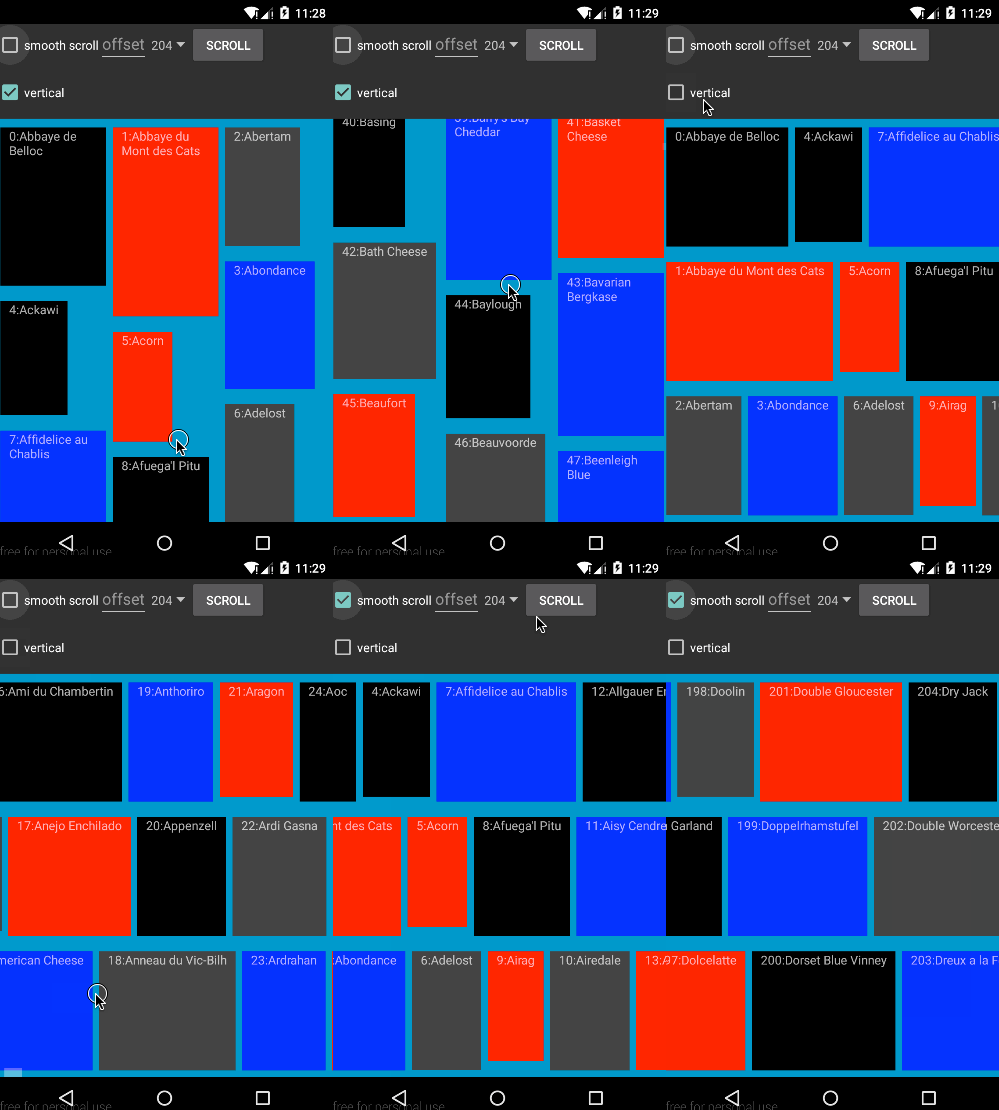
从Android SDK目录可找到源码,或从这里下载

